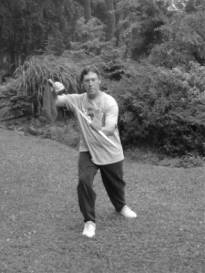
 Gilman Studio On-Line Lessons
Yang Style
Tai Chi Dao/Saber/Broadsword
This Lesson Contains:
Movement # 7 – Circle To The Left And Uppercut
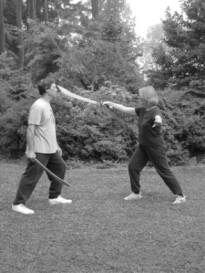
This is a beautiful movement that illustrates some of the central principles of Tai Chi – not opposing energy, joining, sticking, leading, moving inside, and using the whole body. Weapons make the principles more visible then the solo form. In this case, Stephie attacks my face with the point her saber. I neutralize by joining, sticking, and leading her to my left. I step inside, being sure to use sticking energy so she can’t escape, and follow with a large upper cutting movement.
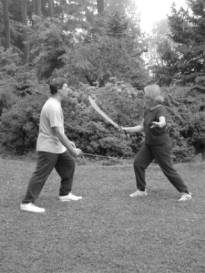
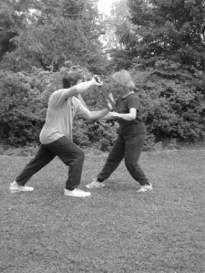
 1) We are threatening each other.
2) Stephie attempts to poke me in the face. If I donÂ’t do something, she could get me.

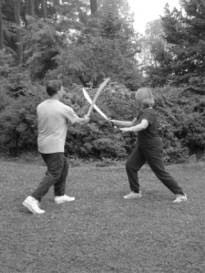 1) As the poke comes in, I sink back onto my right foot, and as I do, I join with her saber.
2) I start to move in while sticking and continuing to lead her saber past me. At this point it is important not to put too much pressure outward as it might force the opponent to disengage and circle down toward my leg. The sticking energy should be light and sensitive.

 I step ahead with the right foot, continuing to stick. I am now well inside her defenses.
I am well past her saber so I disengage and circle my saber upward, cutting from the lower to upper belly. This is a very strong movement, as I have my whole body solidly behind my saber, and I use both hands as well to make this uppercut.
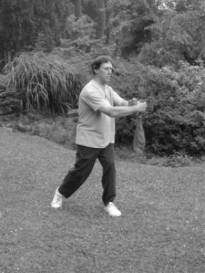
Shift the weight back onto the right foot, and at the same time, turn the torso to the left, facing halfway between west and south. Roll up the left toe so you are just rooted with the heel. Pivot out the toe to face halfway between west and south. Do not lean back and make sure you are in the right Kua.
The left hand remains on or near the right wrist to give support. The left wrist rises and moves with the body to the left. DonÂ’t let the elbow rise up very much. As that happens, the right hand rotates so that the cutting edge is facing upward and the blade is basically parallel to the ground. You are starting to make a large counterclockwise circle on the left side of the body.
Focus on the outside flat surface of the saber, most probably about halfway down its length. Imagine sticking with that spot to the opponent.
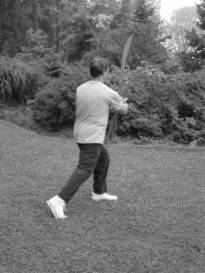
Shift the weight onto the left foot and as you do roll up the back foot onto the toe. We are starting to take a step forward with the right foot. The torso faces the same direction the toe is headed.
The hands are basically in the same relationship to the body; only the right wrist is continuing to rotate so the saber continues its circle on the side of the body. Now it is basically straight up.
Focus on the saber to continue sticking as you make your circle.
Note: This is one of those times where having a practice partner will really help. He would poke toward you while holding the saber in his right hand and you would practice joining and sticking while stepping in.
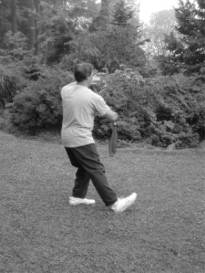
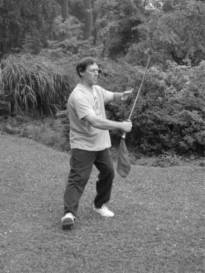 Making the step to move inside.
Step ahead with the right foot, just touching down the heel. The toe faces west. The weight remains in the left leg/Kua. Be sure to step wide enough to the right so the leg can act as a break for the strong twisting movement to that direction.
The right arm continues its circle. It is dropping slightly, as it is going to sweep back up for the upper cut. The saber is still attached to the opponentÂ’s. My point is still facing almost upward.
The left hand has separated itself from the right hand is getting ready to press the cutting edge upward.
Focus on the attachment of the saber to the opponentÂ’s.
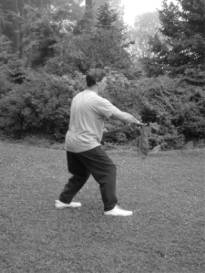
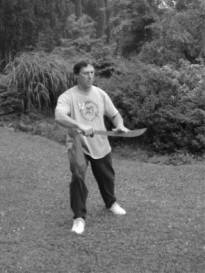 Starting the uppercut. I am now inside the opponentÂ’s guard.
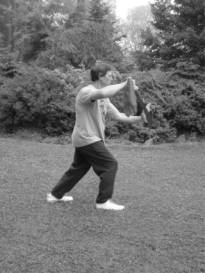
I am starting to shift the weight onto the right foot, and as I do, I turn the torso to the right. At this point, I am about halfway to the end of the movement.
The right arm is continuing the sweeping motion. It is moving with the torso turn to the right. The right hand is about at its lowest level, near the upper belly. The left hand (heel of the hand, nearest the wrist) now attaches to the backside of the saber. It is joining in the sweeping up motion, and will add a strong press soon.
Focus on the cutting edge of the saber.
Note: Be very careful you donÂ’t let the fingers of the left hand get in front of the blade. If it was sharp you could cut your fingers.
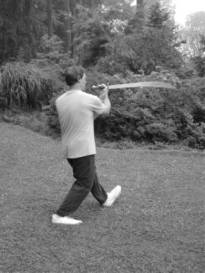
Complete shifting the weight onto the right foot and turning the torso until the body faces west. The knee just covers the toe.
The right hand finishes pulling upward and to the right. It ends on the right side of the body, about jaw level. Keep the elbow as relaxed as possible.
The left hand was pushing the back of the saber, about 2/3rds of the way down the blade. It is about waist level. Notice the angle of the blade. The cutting edge is further away from the body and the blade is at an angle across the front of the body. The whole upper cut movement was a large circle first around the left side of the body and then diagonally across the front.
Focus on the cutting edge (the lower third).

